

loading...
Please join Writing and Editing Intern Erica deVeer as she shares her experience making this Chocolate Truffle Cake on Easter (2013). I love Erica’s reflections on the difference between convection ovens and traditional gas or electric stoves. And, I love, especially, her ability to make a beautiful dessert even when things don’t quite go as planned. Here’s her experience in the kitchen, recipe, tips, and tricks. –Helana
—
Chocolate Truffle Cake
So, you might have read about the end of my Lenten experience this year after going 47 days without meat. Ironically, after I had abstained from meat for six and a half weeks, the meal my mom had planned was comprised of seafood specialties.
When my mom told me about our Easter menu—
[with me being our family’s sweet-lover as well as the adventurous baker who will not let the challenge of stacking cakes and tempering chocolate deter her!]
—I excitedly asked about dessert.
I knew, without a doubt in my mind, that we would have something laden with sugar and dripping with chocolate (we always do). Encouragingly, my mother responded that I could be in charge of my desperate desire—the chocolate dessert—and I promised her that, like a freshly hatched egg to a hen, the chocolate dessert would be my baby for Easter dinner.
I pulled out my All-New Ultimate Southern Living Cookbook (2009) that my parents had given me for Christmas in 2011 with a note that reads, “Bon Appétit! Merry Christmas, Erica,” inside the cover and numerous sticky notes that mark recipes I will one day make and master, such as crispy Shrimp Cakes with Watercress Remoulade (page 233), sweet Baked Ham with Bourbon Glaze (page 322), and fresh, bright Biscotti with Lavender and Orange (page 184).

Pictured: the front cover of the All-New Ultimate Southern Living Cookbook (2009), where I found the following recipe for Chocolate Truffle Cake on page 136.
I flipped through the glossy pages until I landed in the cake section—yes, an entire chapter dedicated to baking and frosting cakes!
I had been itching to create something fluffy and self-rising topped with something creamy for almost two months. Unable to satisfy my impulse, I stalked those lovely confections on Foodgawker, adding into my favorites list sweets (and meats) that had seemed only too distant of a dream during those dry days of Lent.
Here I was now, with the whole of Southern Living’s tried-and-true expertise at my fingertips, eager to begin sifting and beating. So when I landed on this beauty…
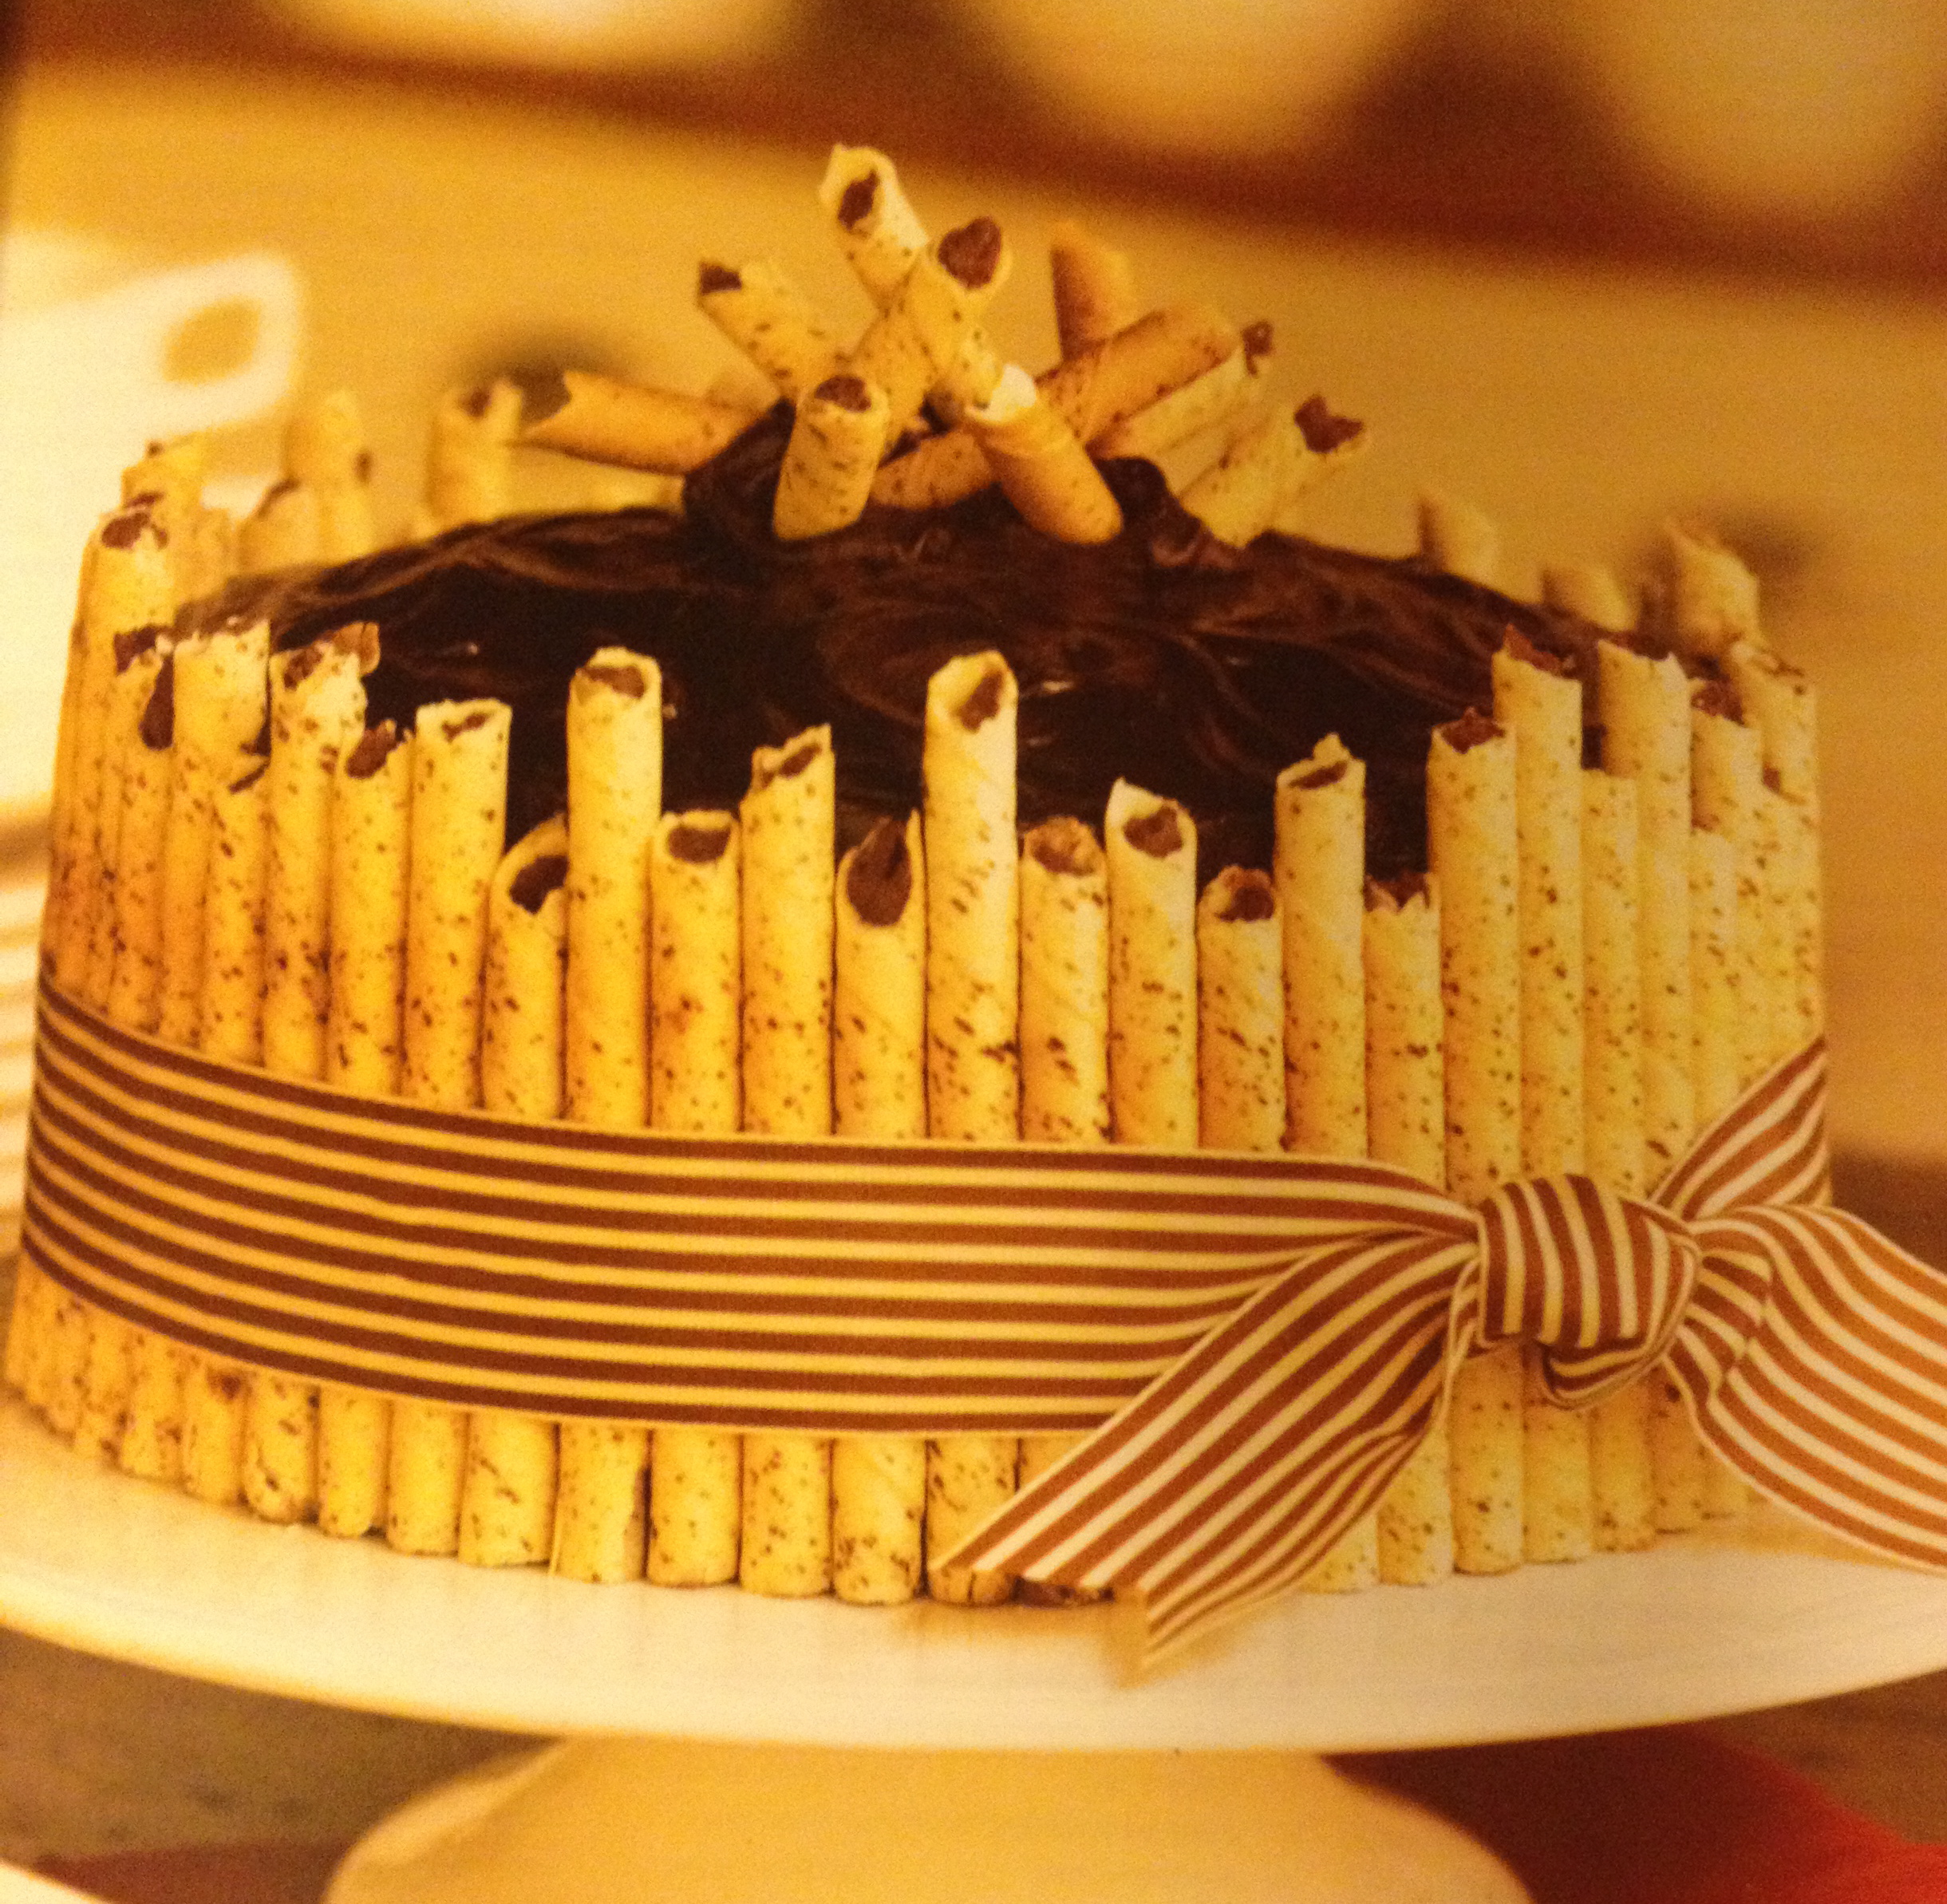
Pictured: Southern Living’s version of Chocolate Truffle Cake decorated with a ribbon.
I said, “I want that.”
My mom, being the planner that she is—a trait that has so graciously been passed on to me—asked me to send her a grocery list the week before Easter so that she could track down the right ingredients, making the process that much easier for me.
[I just want to point out: what a great Momma, encouraging her daughter’s obsession with chocolate!]
So, when I texted her this…
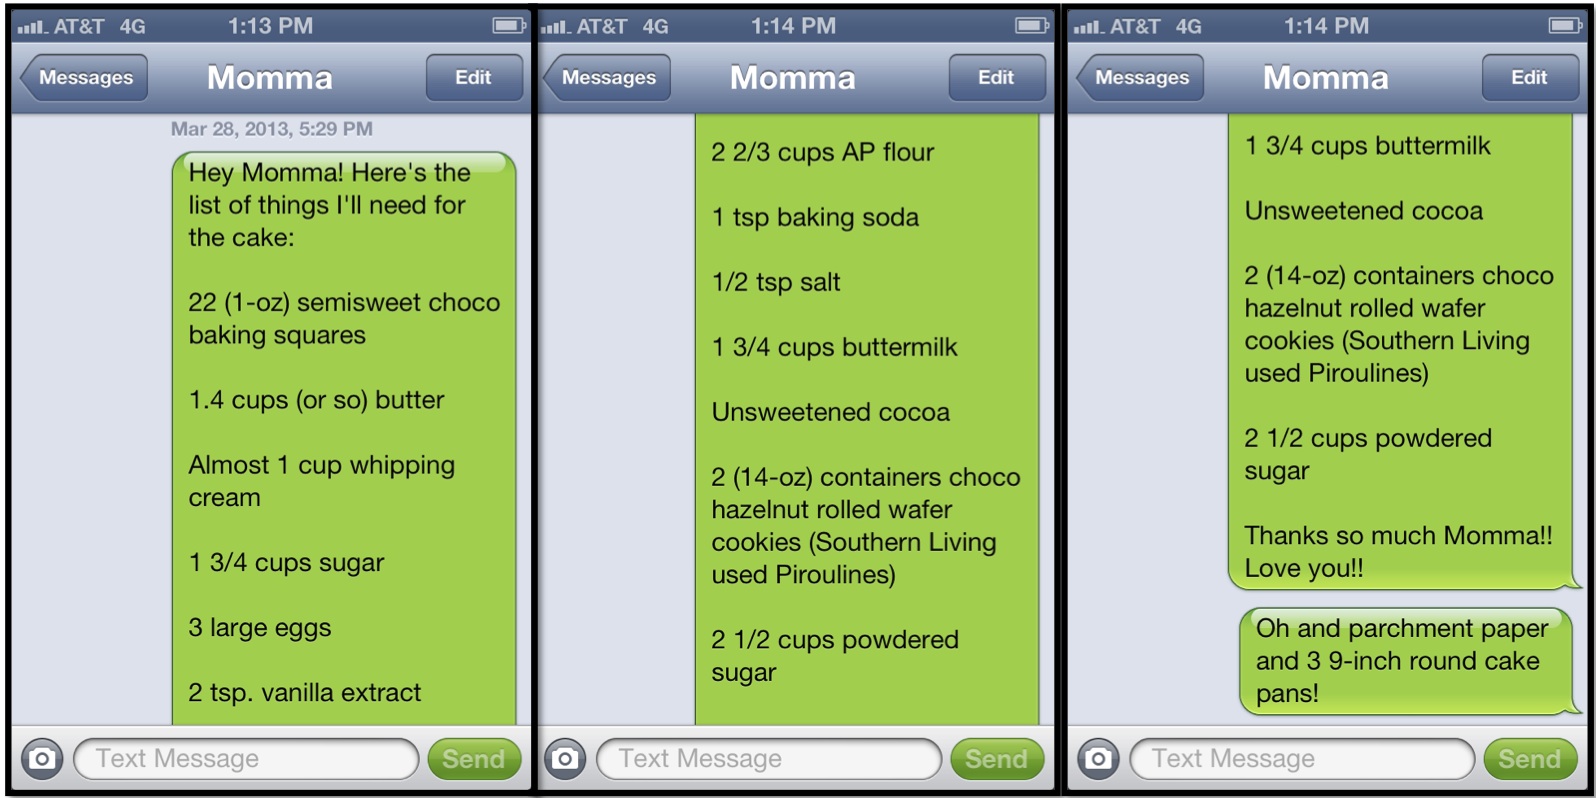
Pictured: screenshots of the text messages I sent to my mom with the list of ingredients for our Easter cake.
…she replied, “That is gonna be one special cake!!!”
She was not lying.
On Friday night, after driving to Mobile for three hours, I saw the ingredients on the kitchen countertop and remembered the note under Southern Living’s recipe that says, “For best results, bake the cakes a day ahead.” I decided, “Hey, might as well give this a go right now.” Like the enthusiastic, chocolate-deprived, sheltered-from-disaster-in-the-kitchen baker that I am, I dove in head-first.
The mixing went well. I did exactly what the recipe said.
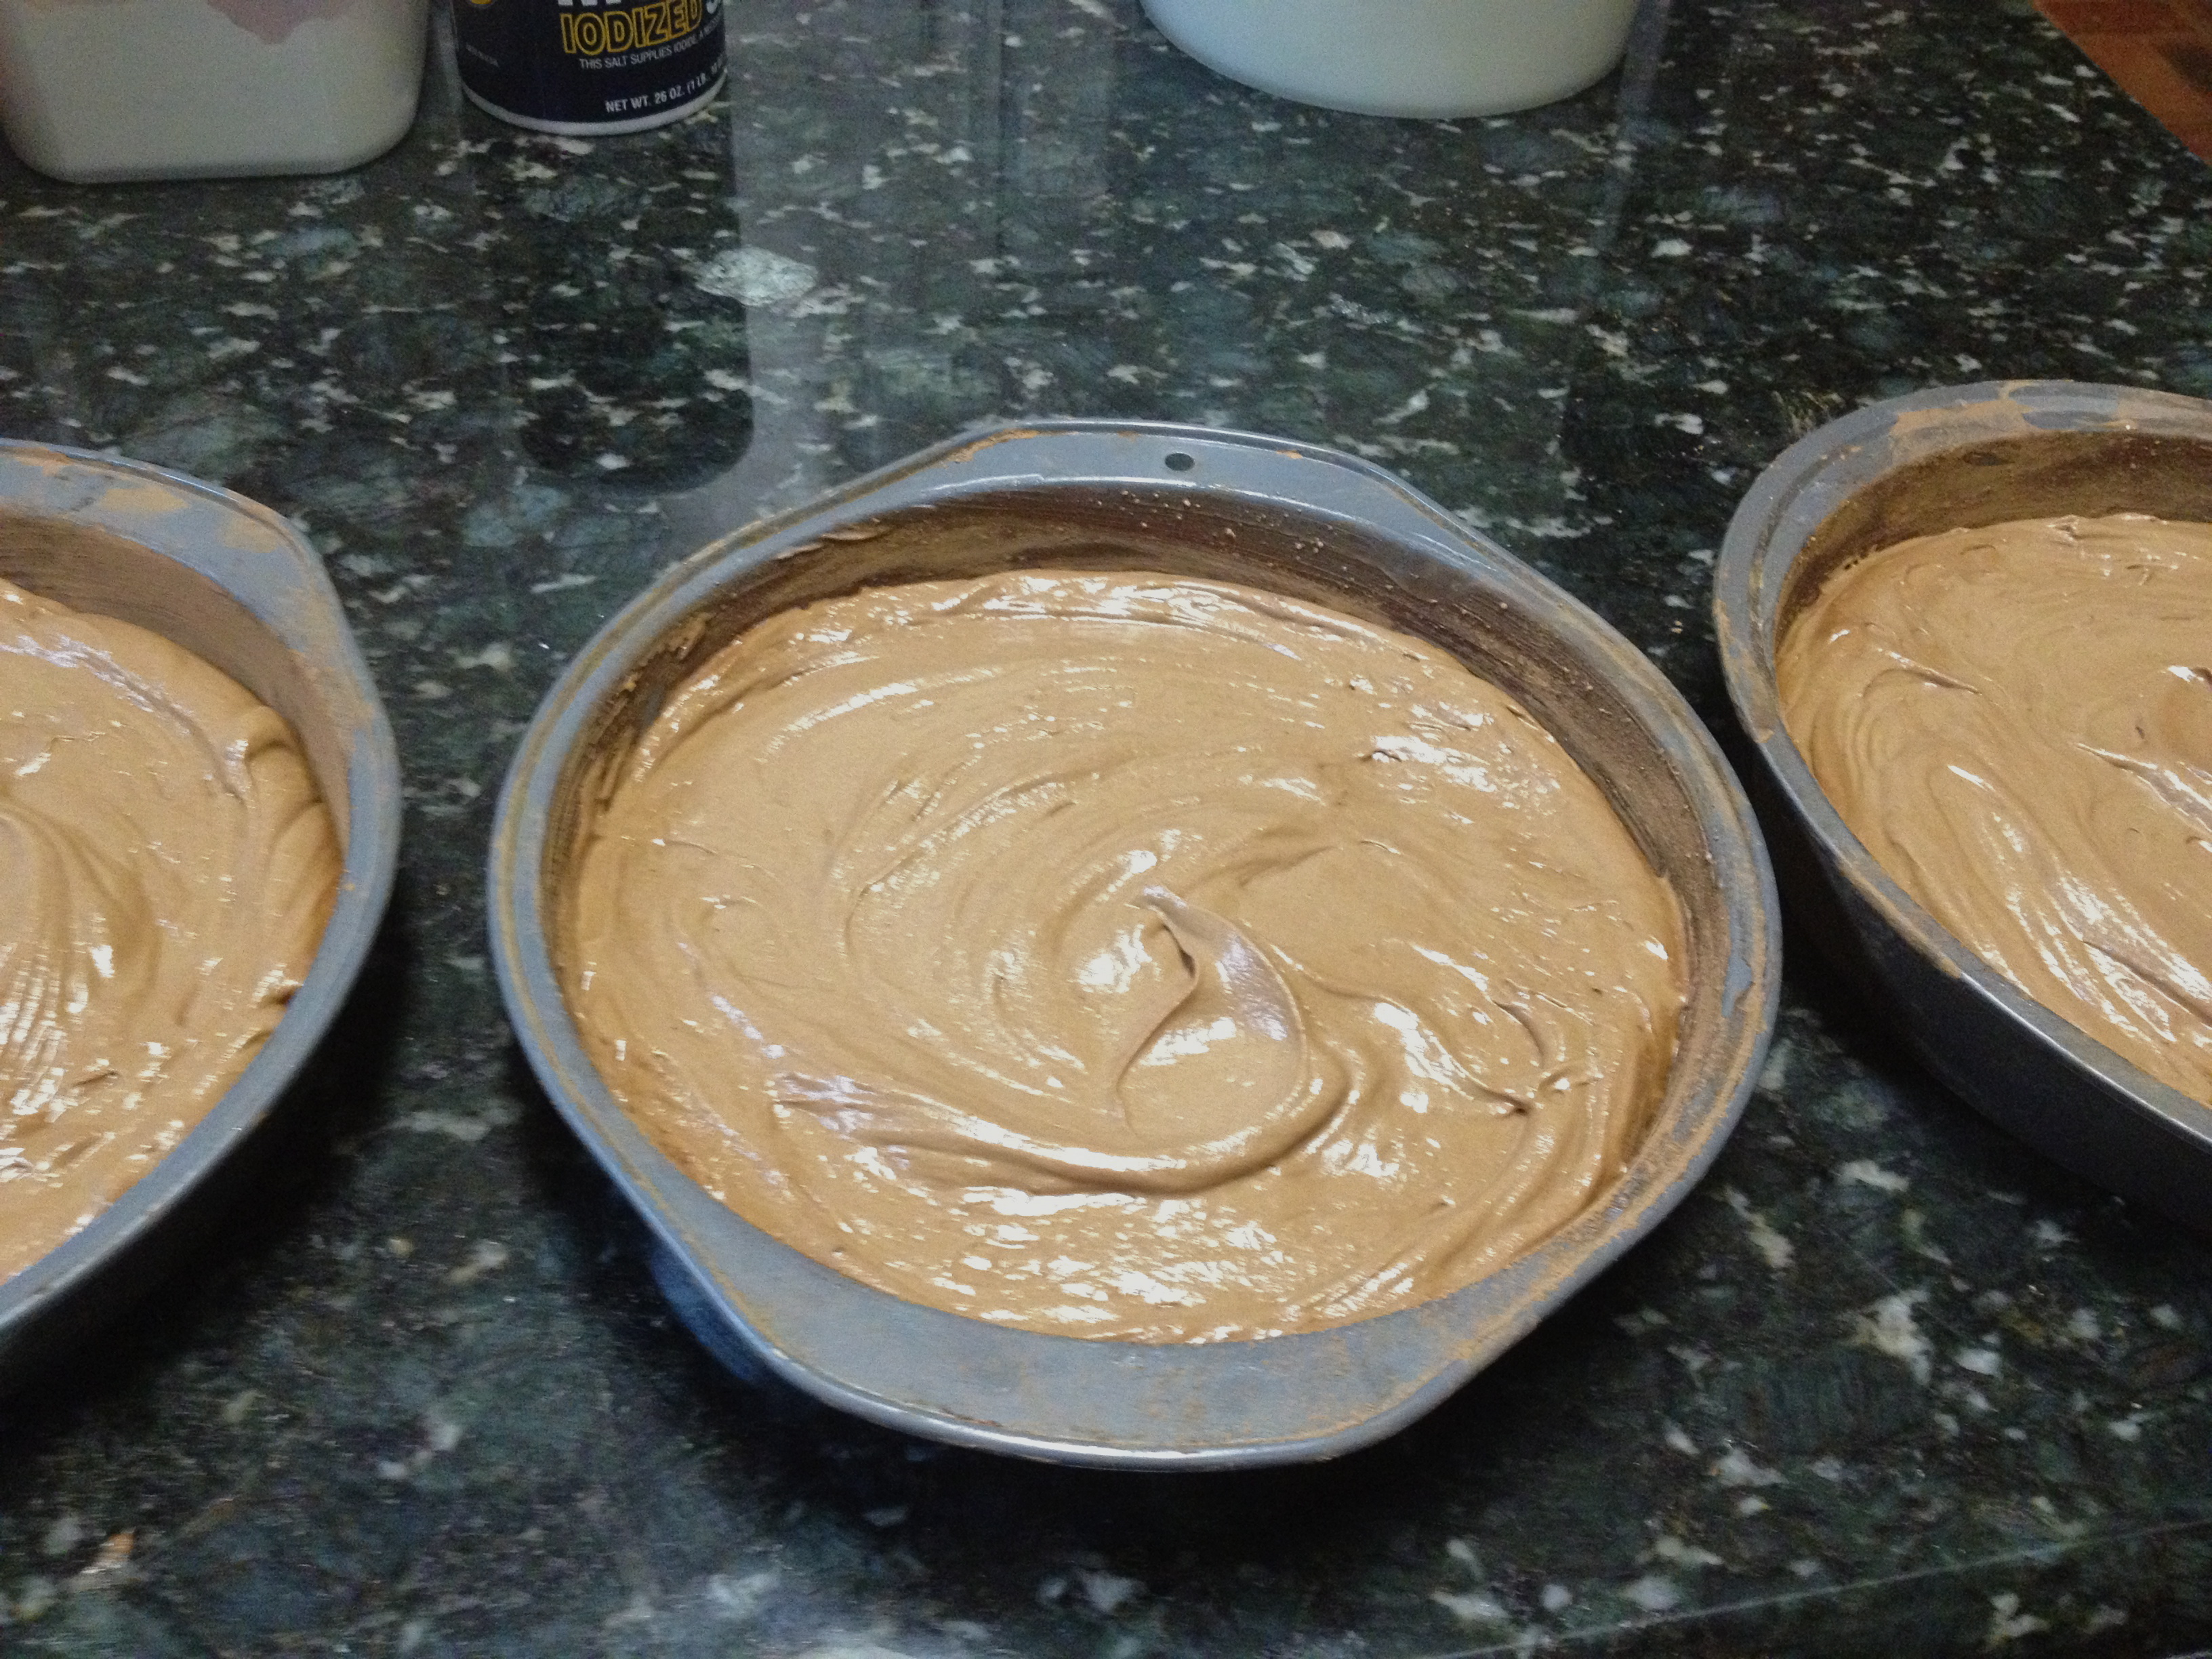
Pictured: my three greased and cocoa-dusted (9-inch) cake pans filled with a perfectly mixed chocolate cake batter and ready for the oven.
I saw this homogeneous, light brown, smooth, and creamy batter and thought, “Who thinks baking is hard? All you have to do is follow the directions exactly as they tell you to, and every cake will come out perfect!”
I slipped the three pans into the stainless steel oven that I had set for 350 degrees. But I had already made a fatal mistake—
I hit CONVECTION.
Little did I know, when you turn on CONVECTION, it doesn’t cook your ingredients the same way that an oven on the simpler BAKE setting does.
This difference between “bake” and “convection” is something the baking fairies at Southern Living forgot to mention in the recipe, so I had to learn this nugget of knowledge through experience.
I had cooked the cakes for 22 minutes as the directions told me. Southern Living doesn’t even say “22 to 25 minutes.” Simply, “22 minutes” at 350 degrees. At the 20-minute mark, I poked the center of one cake with a cake tester—not the simple wooden pick that Southern Living suggests—but it came out completely wet with batter.
After the remaining two minutes of prescribed time, I poked each cake again with the cake tester, and they came out completely clean—
“That was quick! Wow, those people at Southern Living really know how much of a difference two minutes of baking makes,” I thought.
I pulled the cakes out of the oven, let them all rest for ten minutes in their pans, and then flipped them—expertly, if I do say so myself—onto three separate wire racks in order to let them finish cooling.
I felt so accomplished, showing my dad.
“It was simple, really,” I bragged. “Anyone could do it.”
Suddenly, the tops (or, technically, the bottoms) of the cakes started caving in, creating three identical craters across each cake layer.
“Um, Dad, is that normal?” I asked the smart engineering man.
“Oh, I’m sure. The cakes are probably just settling.”
When it seemed like the caving was never-ending, I crouched low so that I could see what was happening beneath the wire racks.
[If only I had taken a photo of this scene! I think I was too ashamed…]
Hurriedly, I flipped each cake back into the pans to assess the damage.
The cake—or the uncooked batter, I should say—had fallen through the wiring!

Pictured: my failed attempt at baking these chocolate cakes. This is what the product looks like when the center is not fully cooked yet you flip the battery cakes onto wire racks to cool anyway.
Instead of dumping these, let’s say, thirty-dollar cakes and starting over again or just settling for buying a chocolate cake down the road from Winn Dixie, my mom encouraged me to try to recover.
“If at first you don’t succeed…” You know the saying.
My mother and I troubleshooted about what could have gone wrong. I walked her through my steps, barely getting past the part where I pushed the CONVECTION button. She stopped me and suggested that this decision had probably been my mistake. I insisted that baking with the convection on was better than baking without it, so that couldn’t have possibly been the reason my cakes weren’t completely cooked.
[What did she know? She’d been cooking and baking for three decades. I’d been cooking and baking for three years….]
She left me to figure out how to fix the cakes on my own. Her suggestion hung in the air, though, over my head like a freshly whipped, fluffy meringue.
Looking at my decimated cakes, I pushed the BAKE button and waited for the oven to heat up to a true 350 degrees.
[In CONVECTION mode, the oven only heated up to 325 degrees since the fan would move the hot air around more evenly.]
The cakes, after 22 more minutes of baking—on top of the 22 minutes during which the cakes were in the oven on CONVECTION—finally cooked all the way through in the center. So, contrary to the 22 minutes’ time in which Southern Living claimed the cake would bake, my cakes were in the oven for a total of 44 minutes:
22 in CONVECTION + 22 in BAKE.
So, what went wrong? Since I love lists (another trait that I get from my mom), here are a few of my hypotheses:
1.) CONVECTION – I baked my cake on convection.
After telling Helana about this mishap, she told me about a time in recent domestic history when home cooks began to hate convection ovens because they seemed to be wrecking homemade creations (here’s a link to a forum of bakers and here’s a link to a blog post if you want to learn more about convection cooking).
Well, add me to that school of thought—Death to CONVECTION!
2.) The cake tester – The first time I inserted the cake tester and pulled it out, the test actually worked properly.
My cakes were not done, and the liquid batter line on the tester confirmed that. The subsequent times that I inserted the cake tester and it appeared clean after I pulled it out of the cakes were faulty tests.
Why is that?
Helana suggests that I should have used a sharp knife, which she thinks works best and most accurately—even more than a wooden pick.
My theory: I think the exterior of the cake had baked tightly, creating the same phenomenon of holding a rag around your car’s oil dipstick when checking the oil and pulling the dipstick through the rag in order to clean it (see step 4 here as an example of what I mean with the oil).
Basically, the exterior of the cake had baked so well that it wiped the cake tester clean when I extracted it from the center of the cake, giving me a false reading about the cake’s readiness. Maybe if I had wriggled the tester around while it was inserted in the cake, creating a larger hole in the cake than the tester’s circumference, the exterior layer of the cake would not have wiped the uncooked batter from the tester. But this is just a theory.
3.) Southern Living’s Recipe – It is definitely possible that Southern Living’s recipe, along with my inexperienced baking skills, caused the mishap.
Twenty-two minutes to bake a cake in a 9-inch round cake pan? I’ve cooked cupcakes—which normally have 3-inch diameters as opposed to the 9-inch diameter of the cake layers—for almost the same amount of time.
And, generally, convection ovens are supposed to cut down on your cooking time and cook more evenly. But my convection oven did neither. So, maybe Southern Living’s original recipe is flawed.
Once the baking was completely done and the layers were cooled, I began constructing the cake by heaping scoops of Chocolate Truffle Filling between the layers—which evened out the bumpy surfaces—before spreading the Ganache around the sides and on top of the cake.
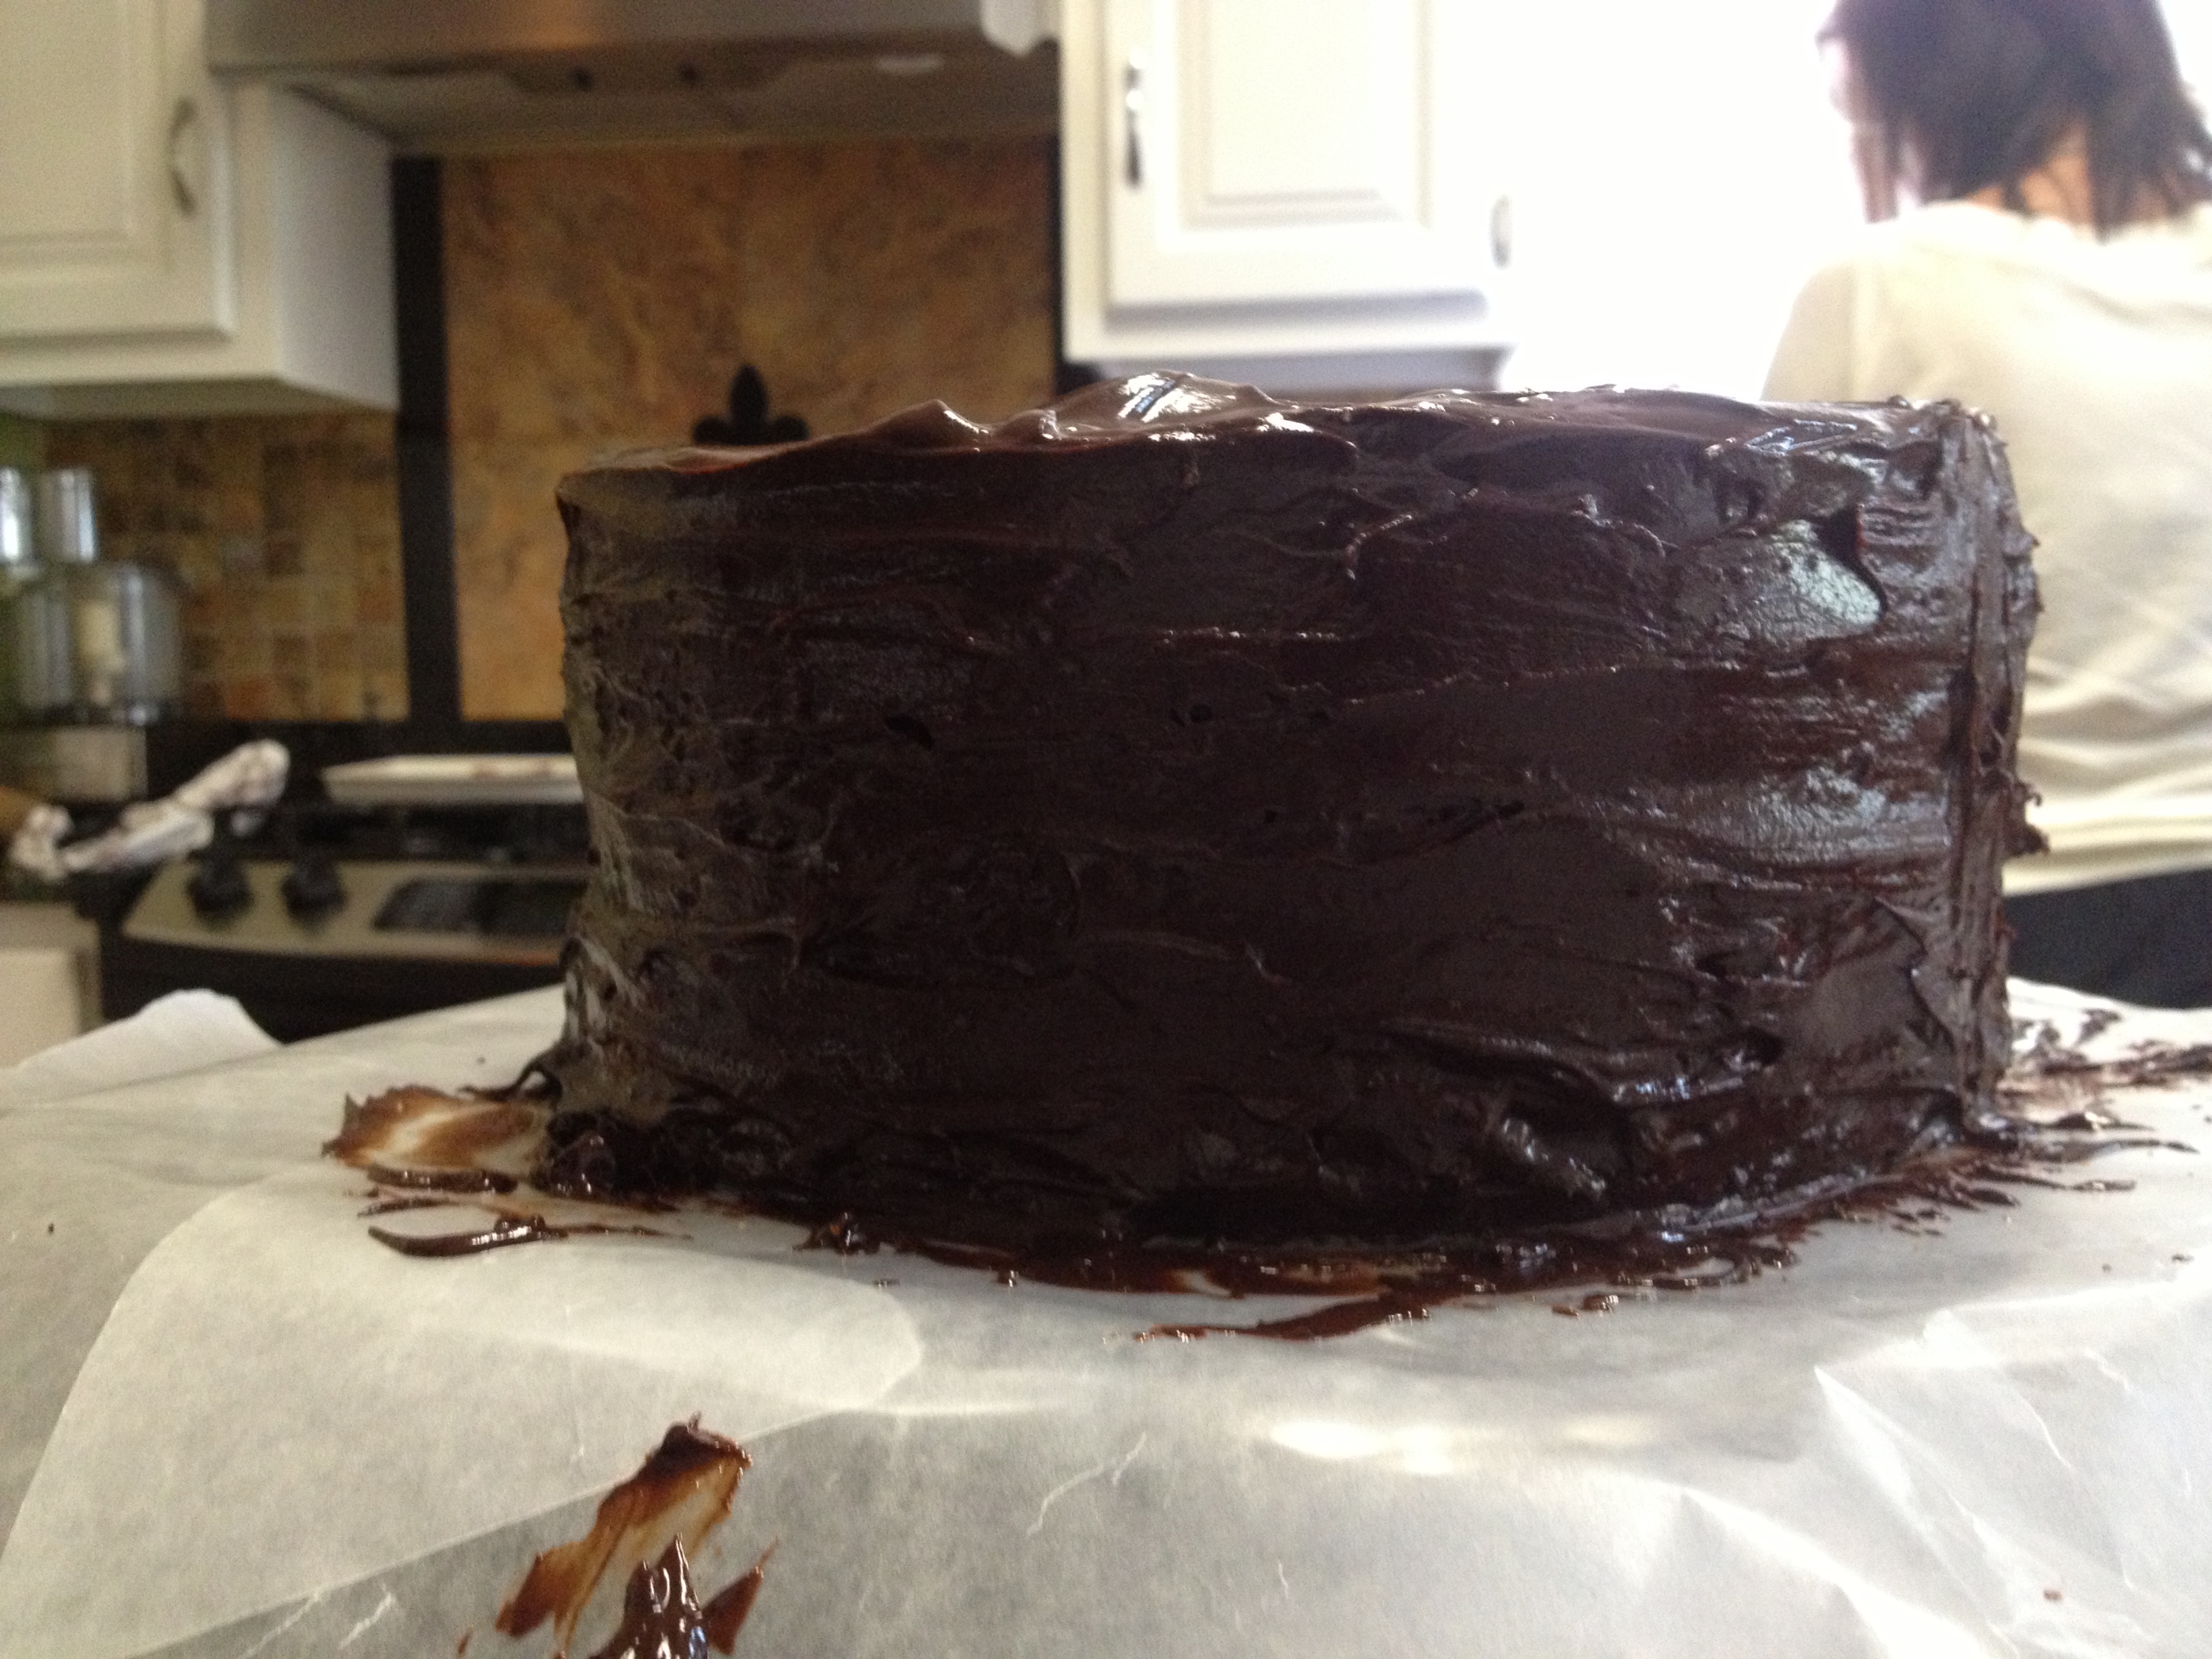
Pictured: the cake layers stacked and topped with Ganache, perfectly hiding the disaster that we saw above. My mom is in the background, preparing our seafood Easter dinner.
Come to find out, filling and frosting perfect most imperfect baking experiences.
Here’s the final product.
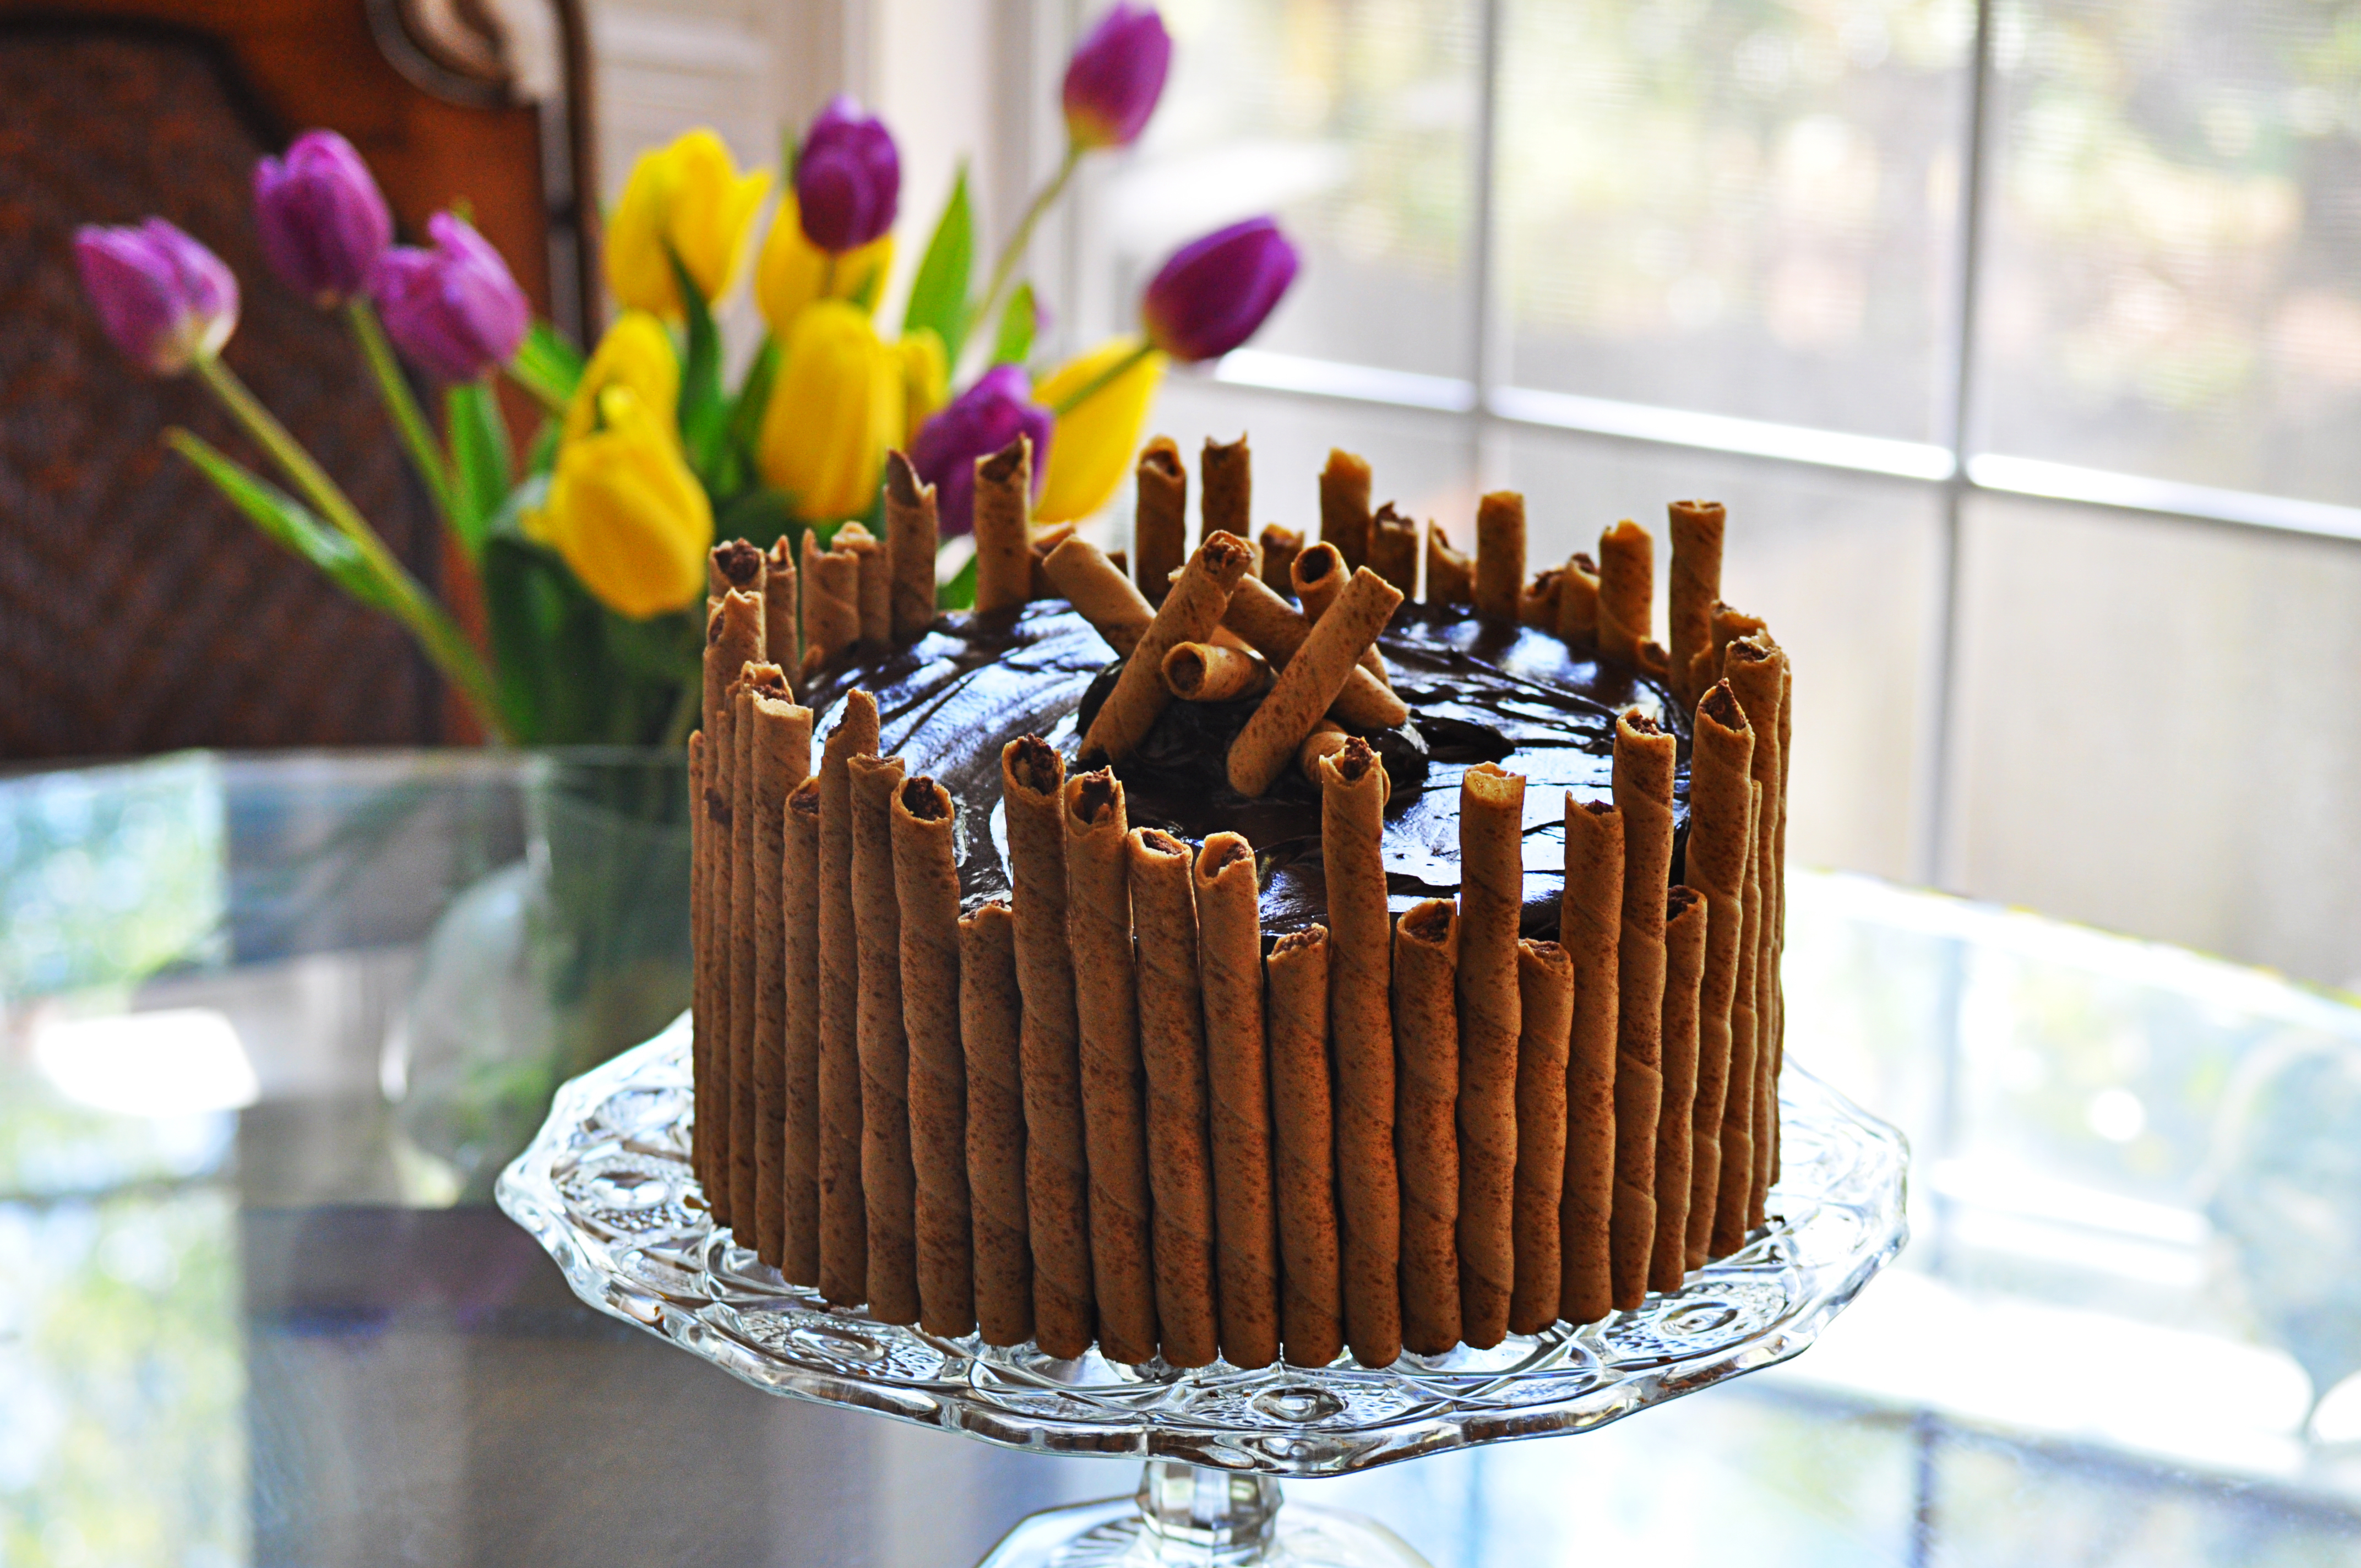
Pictured: the finished product, captured beautifully by my mother, Cathi deVeer, who was all too eager to put her photography skills to the test.
And here’s the recipe. I tried to keep it as close to Southern Living’s original as possible, hoping that you can learn from my mistakes and offer me any advice you may have about the recipe and baking in convection ovens.
Happy Baking!
Chocolate Truffle Cake
As in The All-New Ultimate Southern Living Cookbook (2009)
Yields: 16 servings
Calories: 801.6 (see here for full nutrition information)
Prep Time: 64 minutes
Cook Time: 24 minutes (questionable)
Ingredients:
Cake:
* 8 (1-ounce) semisweet chocolate baking squares, chopped
* 1 cup butter, softened
* 1 3/4 cups sugar
* 3 large eggs
* 2 teaspoons vanilla extract
* 2 2/3 cups all-purpose flour
* 1 teaspoon baking soda
* 1/2 teaspoon salt
* 1 3/4 cups buttermilk
* Crisco or butter, for greasing cake pans
* Unsweetened cocoa, for dusting cake pans
Chocolate Truffle Filling:
* 4 (1-ounce) semisweet chocolate baking squares, chopped
* 6 tablespoons butter
* 6 tablespoons heavy whipping cream
* 2 ½ cups powdered sugar, sifted
Ganache:
* 10 (1-ounce) semisweet chocolate baking squares, chopped
* 1/2 cup heavy whipping cream
Other Things You Will Need:
* 3 (9-inch) round cake pans
* Parchment paper
* 2 (14-ounce) containers chocolate hazelnut rolled wafer cookies (I used Pirouettes)
For the Cake:
1.) Preheat oven to 350F. In a glass bowl, microwave chopped chocolate for 1 minute on HIGH or until the chocolate is melted, only stirring once.
2.) Beat the butter and the sugar with an electric mixer at medium speed until the mixture is fluffy. Add eggs, one at a time, beating intermittently until the yellow disappears. Beat in cooled chocolate and vanilla extract until they are blended.
3.) In another bowl, combine flour, baking soda, and salt. Add these dry ingredients to the butter mixture, alternately adding the buttermilk, beginning and ending with the flour mixture. Beat at a low speed until all the ingredients are just blended.*
*When adding the flour mixture and the buttermilk, be mindful that the beater may spit batter out at you.
4.) Pour the batter into 3 greased parchment paper-lined cake pans (9-inches) dusted with cocoa. Bake at 350F for 21 to 22 minutes or until a wooden pick inserted in the center comes out clean.*
*It is important to make sure that the center is cooked completely through. Allow the three cakes to cool in their pans. Remove cakes to wire cooling racks by placing the racks on top of the cake pans and flipping. The cakes should slide out of the pans. Allow them to continue to cool on the wire racks, preferably overnight.
For the Chocolate Truffle Filling:
1.) Microwave chocolate and butter for 1 minute on HIGH or until the chocolate is melted, only stirring once. Stir in heavy whipping cream. Gradually add the powdered sugar, stirring until it is blended and smooth.
For the Ganache:
1.) In a medium-sized glass bowl, microwave the chocolate and the heavy whipping cream for 1 minute on HIGH or until melted and smooth, only stirring once. Cool for 20 minutes.
To Finish the Cake:
1.) Place the first layer on a cake stand. Spread the Chocolate Truffle Filling on top of first layer, then add the second cake layer, spreading the remainder of the filling on top of the second layer. Finally, place the third cake layer on top. Keeping 1/4 cup of the Ganache off to the side, spread the remaining Ganache on the sides and top of the cake.
2.) To decorate, break off the tops of the cookies irregularly, still making sure they are long enough to reach the top of the cake. Line the sides of the cake with the uneven broken cookies. With the reserved Ganache, form a small mound in the center of the top of the cake and place some short pieces of cookies on the mound.
—
 Erica deVeer is a recent graduate of Louisiana State University, with a Bachelor’s degree in English – Creative Writing with minors in French and History. Erica will be attending the University of New Orleans’ Master of Fine Arts program — the Creative Writing Workshop — to study and to write contemporary fiction beginning in the Fall. She has also recently won the Undergraduate Fiction Award at the Gulf Coast Association of Creative Writing Teachers Conference in April 2013 for her short story, “Summer.”
Brought up in a family of Louisiana foodies, Erica loves all things delicious, spicy, and, especially, sweet.
Contact: erica [at] clearlydeliciousfoodblog [dot] com
—
Follow Erica on Pinterest: http://pinterest.com/ericafrances/
Twitter: https://twitter.com/EricadeVeer
Tumblr: http://veri-hungry.tumblr.com/
Instagram: http://instagram.com/ericadeveer
—
Follow Helana on Pinterest: http://pinterest.com/helana/
Twitter: https://twitter.com/DancesWLobsters
Facebook: https://www.facebook.com/pages/Clearly-Delicious/103136413059101
Tumblr: http://clearlydelicious.tumblr.com/
Instagram: http://instagram.com/helanabrigman
Chocolate Truffle Cake,
3 Comments
Clearly Delicious » Food Photography Tips for Bloggers
May 17, 2013 at 7:12 am[…] Example: Erica deVeer’s Easter Sunday recipe for Chocolate Truffle Cake: […]
Salvador Dali
May 19, 2013 at 3:30 amThis cake is amazing! I’m love it 😉
Clearly Delicious » The First Thing I Ate After Lent…
May 25, 2013 at 4:11 pm[…] To read about my first taste of chocolate after Lent along with some of my mishaps along the path to sweet satisfaction, read my post here. […]